49-node Indoor Mesh: Difference between revisions
| Line 5: | Line 5: | ||
* [[Media:Lab_day1.pdf|'''Day 1 of workshop''']] | * [[Media:Lab_day1.pdf|'''Day 1 of workshop''']] | ||
* [[Media:Lab_workshop_day2.pdf|'''Day 2 of workshop''']] | |||
==Introduction== | ==Introduction== | ||
Revision as of 08:32, 25 August 2009
Manuals now available
Introduction
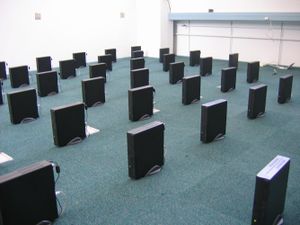
Their are a plethora of mesh routing protocols being used worldwide today (See: Wireless Mesh Networking). Some of these have become popular due to organizations taking the trouble to convert the specification into usable code that can be run on a wireless router while other protocols remain purely academic and have only been run on computer simulations. There is also a new 802.11s working group which is seeking to create Mesh Standards. Protocols for which code is available will be run on the massive mesh, indoor testbed, which consists of a grid of 49 nodes (See 1st thumbnail image). Some code will also be ported to run on the massive mesh - for example HSLS is being ported to FreeBSD and Linux. Performance metrics will be gathered such as average throughput and latency together with their variance.

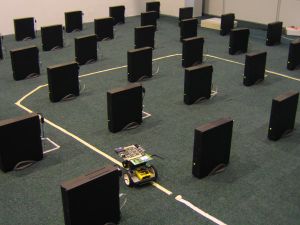
Mobility on wireless mesh networks is also a feature that we aim to test. One method of doing this is by using roaming nodes built onto robots like the Mesh Wanderer Lego robot shown in the 2nd picture. Each protocol is generally suited to different scenarios, some scale better to very large meshes due to less broadcast traffic others are better at handling mobility. Once all these metrics are gathered, better protocol choices can be made when a mesh network is built.

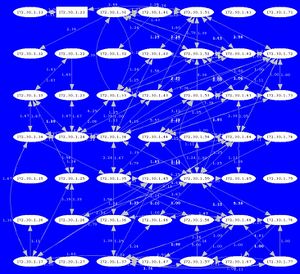
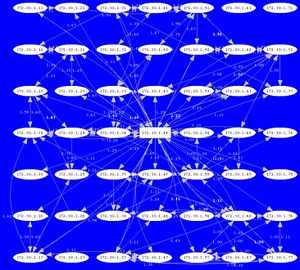
The 3rd and 4th thumbnail images on the right show two scenarios represented by the OLSR Dot Draw visualization tool. The 3rd image shows mesh configuration with no omni antennas attached, while the 4th image shows mesh configuration with an omni attached to node 44.


Other visualization tools are also being worked on.
Operating Systems
The lab has been designed so that it is possible to network boot every node off a single server. This allows us to easily change the software running on the clients right down to the operating system level. The server runs on FreeBSD and the first operating system that was used on the clients was also FreeBSD. The OLSR mesh routing protocol was also implemented on the FreeBSD enabled clients to test the concept. Since many of the routing protocols have been implemented in Linux rather than other OS's, the next step was to attempt Linux netbooting.
Getting protocols compiled for the massive mesh
HSLS
HSLS was compiled for NetBSD but a partial port to Linux was done by Proveen Gurung at Telecordia. We recived the code and after some tweaks manged to get it running under linux. The key changes are to edit the /etc/services file before running the deamon.
The file should have the following entries added:
- etx 9090/udp
- hsls 9191/udp
- hslsapi 9292/tcp
- nodeinfo 500/tcp
Once this is done you can run the run_hsls script provided - just change the name of the wireless interface in the script.
How to flash a node in the massive mesh
Create a tar image of the linux file system Change to the root folder of the linux filesystem
tar cvf .../hardcore-linux.tar .
Make an image of the linux file system on the flash card
dd if=/dev/sdb of=hardcore-linux.img
Create a partition on the compact flash card
cfdisk /dev/sdb
Make the file system
mkfs.ext3 /dev/sdb1
tune2fs -c o /dec/sdb1
Untar file system to flash drive
tar xvf hardcore-linux.tar -C /media/disk
Start qemu with info to boot
qemu -append root=/dev/hda1 -kernel/tmp/bzImage /dev/sdb
Run lilo on flash system once qemu is launched
lilo
Now test the flash card
qemu /dev/sdb
Steps to the Ultimate lab platform
Needed Urgently
Web site with these features
- Scheduler
- Current running experiment
- Timetable of bookings
Node control console - all of this only possible from command line currently
- Boot flash image on all nodes
- Boot NFS filesystem image off server
- Reboot row 1,2,3 ...
- Command to send to all nodes
- Console output of node xx
Later nice to have
- Design console to set up traffic over network
- Choose routing protocol to launch
- Setup a set of measurements
- Throughput
- Delay
- Packetloss
- Graph of results – auto generate from gnuplot
- Visualization panel – Graphviz – UCSB type visualization
Practical issues
- Branding - appropriate banners, flyers for the room
- Posters of our projects on the walls.
- Large screen with projector Driven by PC with a web page (?) that has various links to presentations, videos, our mesh stats graphs, etc.
- Numbering of the boxes (small tags we can put on the boxes for reference
- Upgrade our VoIP demo with Cans - nice boxes, easy for transport, built in batteries, etc.