49-node Indoor Mesh: Difference between revisions
No edit summary |
|||
| Line 26: | Line 26: | ||
== Workshop notes from workshop held in August 2009 == | == Workshop notes from workshop held in August 2009 == | ||
* [[Media: | * [[Media:Lab_day1.pdf|'''Day 1 of workshop: Learning the lab tools''']] | ||
* [[Media:Lab_workshop_day2.pdf|'''Day 2 of workshop: The click modular router''']] | * [[Media:Lab_workshop_day2.pdf|'''Day 2 of workshop: The click modular router''']] | ||
==Steps to the Ultimate lab platform== | ==Steps to the Ultimate lab platform== | ||
Revision as of 06:55, 9 October 2009
Manuals now available
Introduction
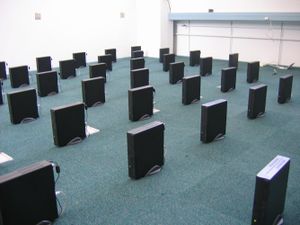
Their are a plethora of mesh routing protocols being used worldwide today (See: Wireless Mesh Networking). Some of these have become popular due to organizations taking the trouble to convert the specification into usable code that can be run on a wireless router while other protocols remain purely academic and have only been run on computer simulations. There is also a new 802.11s working group which is seeking to create Mesh Standards. Protocols for which code is available will be run on the massive mesh, indoor testbed, which consists of a grid of 49 nodes (See 1st thumbnail image). Some code will also be ported to run on the massive mesh - for example HSLS is being ported to FreeBSD and Linux. Performance metrics will be gathered such as average throughput and latency together with their variance.

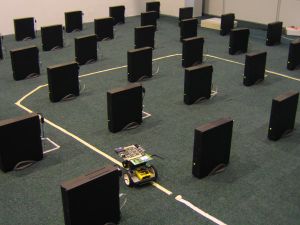
Mobility on wireless mesh networks is also a feature that we aim to test. One method of doing this is by using roaming nodes built onto robots like the Mesh Wanderer Lego robot shown in the 2nd picture. Each protocol is generally suited to different scenarios, some scale better to very large meshes due to less broadcast traffic others are better at handling mobility. Once all these metrics are gathered, better protocol choices can be made when a mesh network is built.

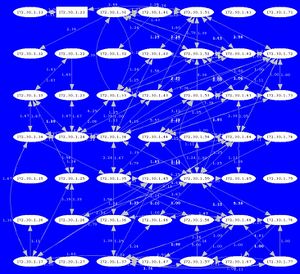
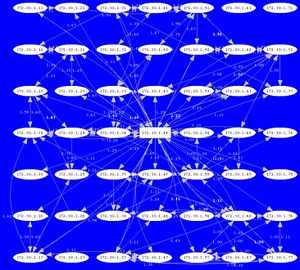
The 3rd and 4th thumbnail images on the right show two scenarios represented by the OLSR Dot Draw visualization tool. The 3rd image shows mesh configuration with no omni antennas attached, while the 4th image shows mesh configuration with an omni attached to node 44.


Other visualization tools are also being worked on.
Operating Systems
The lab has been designed so that it is possible to network boot every node off a single server. This allows us to easily change the software running on the clients right down to the operating system level. The server runs on Linux but there is also an old legacy FreeBSD server that is still running and can be used.
Workshop notes from workshop held in August 2009
Steps to the Ultimate lab platform
Completed
- In April 2009 the server was migrated to an Ubuntu hardy LTS based system and a large range of 2009 ubuntu filesystem images are available to run on the nodes
- A 1 TB raid system was installed in the server to safeguard against data loss
- In August 2009 we completed a scheduler which is only available on the internal LAN at the moment but will soon be available externally for researchers to schedule time in the lab
- We have installed a touch screen in the building which will allow you to access information about the mesh lab
We need to make some of these possible from a GUI - all of this is currently possible from the command line
- Boot flash image on all nodes
- Boot NFS filesystem image off server
- Reboot row 1,2,3 ...
- Command to send to all nodes
- Console output of node xx
- Console to set up traffic over network
- Choose routing protocol to launch
- Setup a set of measurements
- Throughput
- Delay
- Packetloss
- Graph of results – auto generate from gnuplot
- Visualization panel – Graphviz – UCSB type visualization
Demo experiments to make available from a web page
- Start a video streaming experiment over the mesh and observe video degradation as mesh parameters are changed
- Change the routing protocol, power levels, routing protocol parameters, start traffic sources, show graph results